
Challenges of Telehealth in RPM
Challenges of Telehealth in RPM Telehealth has emerged as a pivotal component in the landscape of healthcare services. As medical practices progressively shift towards virtual
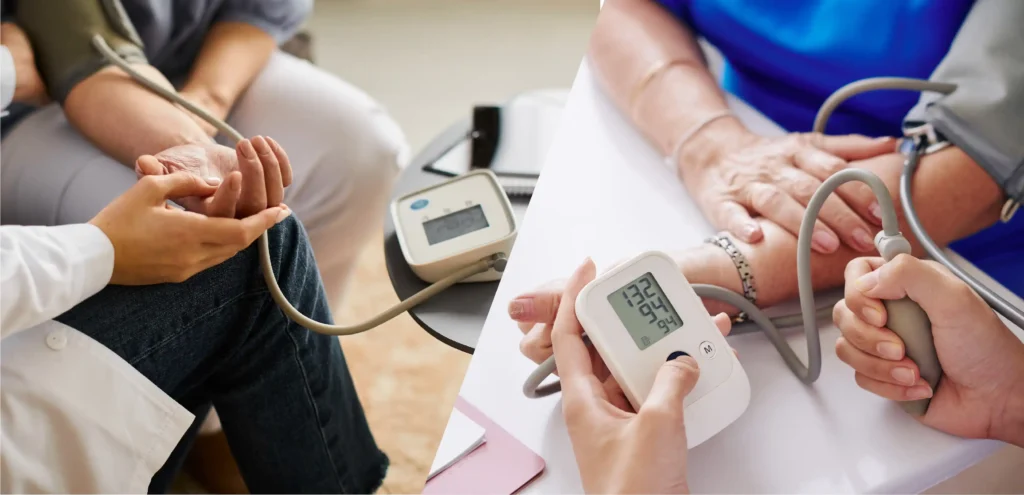
Blood pressure, often mentioned in health and wellness discussions, is a crucial indicator of our cardiovascular health. Have you ever wrapped that cuff around your arm at a doctor’s office, feeling it tighten and then relax, and wondered about the science behind the numbers that pop up?
This machine, which many of us encounter during routine check-ups or perhaps even own for personal use, is responsible for giving healthcare providers pivotal information about our heart’s function.
In this blog, we’ll delve deep into the mechanics of blood pressure machines, breaking down their complexities into simple terms. Whether you’re a curious individual or someone keen to understand the tools aiding in our health assessments, you’re in for a comprehensive exploration.
Blood pressure monitoring dates back to the late 19th century. Before the current methods came into being, physicians would directly insert a needle connected to a mercury manometer into an artery, which was not only invasive but also risky.
Fortunately, the late 1800s introduced the Riva-Rocci cuff, a significant advancement that laid the foundation for modern sphygmomanometers. Later, in 1905, Dr. Nikolai Korotkoff further refined the technique by introducing the method of listening to blood flow sounds, known as “Korotkoff sounds”, through a stethoscope.
The working process of a modern blood pressure monitor, or sphygmomanometer, is both fascinating and precise. Here’s a simplified breakdown:
Cuff Inflation: When you wrap the cuff around your arm and start the machine, it inflates. This inflation exerts pressure, compressing the brachial artery.
Measuring Systolic Pressure: As the cuff deflates, blood starts to flow again, creating turbulence. The first sound of turbulent flow detected by the machine indicates the systolic pressure (the force of blood against the artery walls when the heart contracts).
Measuring Diastolic Pressure: The cuff continues to deflate until the turbulent flow ceases, indicating the diastolic pressure (the force of blood against the artery walls when the heart is at rest between beats).
Digital Display: Modern monitors are equipped with sensors and algorithms that convert these readings into digital numbers, providing the user with an accurate representation of their blood pressure.
By blending historical techniques with today’s technology, blood pressure monitors have evolved to become user-friendly, accurate, and a pivotal tool in health monitoring.
In today’s fast-paced world, the need for quick, accurate, and convenient health monitoring tools has never been more paramount. The digital blood pressure monitor, a modern solution to a long-standing health measurement.
Unlike its analog counterparts, which required manual inflation of the cuff and the use of a stethoscope to interpret the Korotkoff sounds, digital monitors provide a streamlined, automated approach.
A digital blood pressure monitor consists of the following main components:
Unlike the manual pumps of traditional monitors, digital versions automatically inflate the cuff to the required pressure. This ensures a consistent and appropriate level of compression each time.
A crucial component that detects the subtle changes in the cuff’s pressure as blood starts to flow through the compressed artery.
The heart of the digital system. It interprets data from the pressure sensor and uses algorithms to determine the systolic and diastolic readings.
This provides an easy-to-read output of the blood pressure reading, typically showing both the systolic and diastolic numbers, and sometimes even the heart rate.
A feature found in many modern units, it allows users to store multiple readings over time. This helps track trends or changes in blood pressure, providing valuable data for both the individual and their healthcare provider.
Depending on the model, digital monitors might use standard batteries, rechargeable batteries, or a plug-in power source.
Understanding the inner workings of a digital blood pressure monitor requires a grasp of its measurement techniques. These devices primarily use one of two methods: oscillometric or auscultatory, with the oscillometric being the most common for digital monitors.
In the oscillometric technique, the monitor detects oscillations or tiny fluctuations in the cuff’s pressure caused by the pulsation of the blood in the artery. As the cuff inflates and starts to deflate, these oscillations are measured by the machine’s sensors.
When the cuff is fully inflated, blood flow is momentarily stopped. As it deflates, the amplitude of these oscillations grows as blood starts flowing again, reaching a maximum point (representing systolic pressure) and then gradually diminishing until they become barely noticeable (representing diastolic pressure).
The microprocessor in the device interprets these oscillations and calculates the blood pressure values.
In contrast, the auscultatory method, traditionally associated with manual monitors using a stethoscope, is sometimes adapted for digital versions. Here, the monitor employs a microphone to detect the Korotkoff sounds from the artery.
The first audible beat indicates the systolic pressure, and the point where the sounds disappear or change in quality signifies the diastolic pressure. Some advanced digital monitors blend the auscultatory and oscillometric methods, offering even more accuracy.
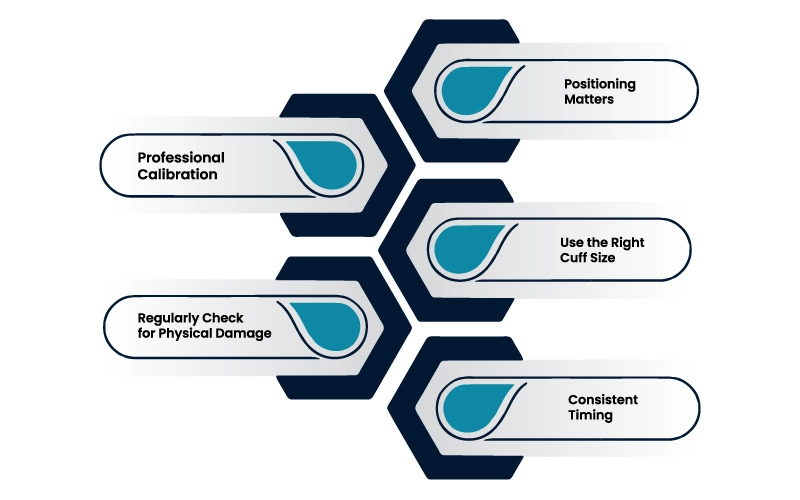
Ensuring the accuracy of your digital blood pressure monitor and using it correctly are critical to obtaining reliable readings. Inaccurate readings can lead to misinterpretations of one’s health, which might result in unnecessary stress or medical interventions. Here’s how you can ensure your device’s accuracy and proper usage:
Both aneroid and digital blood pressure (BP) meters serve the same primary function – measuring blood pressure. However, their operation methods differ, and each comes with its own set of instructions. Let’s explore how to use each type:
Blood pressure readings provide crucial insights into the force of blood against the walls of the arteries as the heart pumps it around the body. These readings comprise two numbers: systolic over diastolic, and they’re measured in millimeters of mercury (mmHg). Let’s dive deeper into what these numbers signify and how to interpret them.
Systolic Pressure: This is the first or top number in a blood pressure reading. It measures the force exerted on artery walls when the heart contracts and pumps blood into the arteries. A higher systolic number indicates that the heart is working harder to pump blood.
Diastolic Pressure: Represented as the second or bottom number, it measures the force on artery walls when the heart is at rest between beats. It reflects the resistance of the blood vessels.
Normal: A reading of less than 120/80 mmHg is generally considered within the normal range.
Elevated: A systolic number between 120-129 mmHg and a diastolic number less than 80 mmHg. This stage indicates a higher risk of developing hypertension if not managed.
Hypertension Stage 1: A systolic reading between 130-139 mmHg or a diastolic reading between 80-89 mmHg. At this stage, doctors may recommend lifestyle changes and may consider prescribing medication, depending on the patient’s risk of atherosclerotic cardiovascular disease (ASCVD).
Hypertension Stage 2: Systolic pressure of 140 mmHg or higher or a diastolic pressure of 90 mmHg or higher. Typically, more intensive treatment is required at this stage.
Hypertensive Crisis: A systolic reading exceeding 180 mmHg or a diastolic reading above 120 mmHg. Immediate medical attention is required as complications are imminent. It’s essential to check for signs of organ damage or get to an emergency room.
It’s worth noting that a single high reading doesn’t necessarily mean you have high blood pressure. Many factors, including stress, caffeine, and certain medications, can temporarily raise blood pressure. Consistently high readings, however, warrant medical attention.
Blood pressure monitoring has evolved significantly, from historical techniques to modern digital devices, emphasizing its importance in cardiovascular health. Whether using aneroid or digital meters, understanding and correctly interpreting the readings is crucial.
It’s not merely about numbers but about the actions we take based on them. Regular device checks and consultations with healthcare professionals enhance our proactive approach to well-being. Ultimately, it’s our informed decisions and commitment to health that make all the difference.
Challenges of Telehealth in RPM Telehealth has emerged as a pivotal component in the landscape of healthcare services. As medical practices progressively shift towards virtual

12 Foods You Should Eat Every Day to Combat Common Health Concerns We all have a complicated relationship with food. Sometimes, it’s a source of

Talk to an Expert Now